
-
Filter By Stock
- In Stock (4)
Filter By Brand
- Arduino (1)
- iduino (3)
Arduino Nano Development Boards
Popular Products
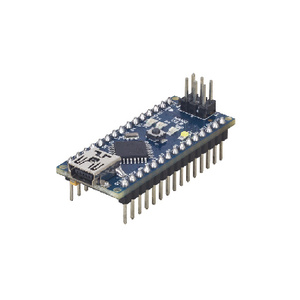
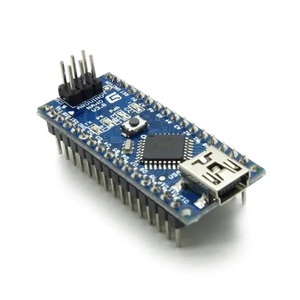
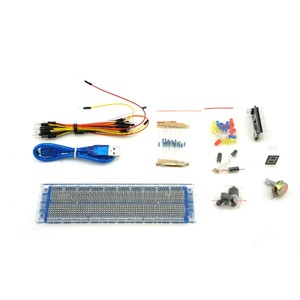
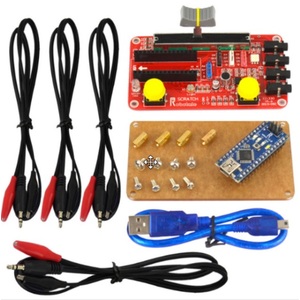
Arduino Nano Development Boards
Explore our range of Arduino Nano development boards at Aus Electronics Direct. The Arduino Nano is a compact, breadboard-friendly microcontroller board designed for electronics prototyping, robotics, automation and DIY projects. Its small footprint makes it an excellent choice for applications where space is limited but reliable microcontroller functionality is required.
Based on the ATmega328P microcontroller, the classic Arduino Nano provides digital and analogue input/output connections, USB connectivity and compatibility with the Arduino development environment. It offers many of the core features of an Arduino Uno in a smaller form factor, making it suitable for compact electronic devices, embedded systems and portable prototypes.
Features of the Arduino Nano
The classic Arduino Nano combines useful microcontroller features with a compact design. Key specifications include:
-
ATmega328P microcontroller: Provides processing capabilities for electronics and embedded projects.
-
Compact dimensions: Measures approximately 45 x 18 mm, making it suitable for space-constrained applications.
-
Digital input/output: Supports digital connections for controlling and communicating with electronic components.
-
Analogue inputs: Provides eight analogue inputs for reading compatible sensors.
-
PWM outputs: Supports pulse-width modulation for controlling LEDs, motors and other compatible devices.
-
USB connectivity: Uses a Mini-B USB connection on the classic Nano for programming and communication.
-
Breadboard compatibility: Designed for convenient installation into breadboards and prototyping circuits.
What Can You Build with an Arduino Nano?
The Arduino Nano is suitable for a wide range of electronics and microcontroller projects. Its compact size makes it particularly useful for applications where a larger development board may be impractical.
Popular Arduino Nano projects include:
-
Small robotics and autonomous robot systems.
-
Home automation and electronic control systems.
-
Temperature, humidity and environmental monitoring devices.
-
LED lighting and display controllers.
-
Sensor-based electronic projects.
-
Portable electronic prototypes.
-
Embedded control systems and DIY gadgets.
Arduino Nano vs Arduino Uno
The Arduino Nano and Arduino Uno offer similar functionality when comparing their classic ATmega328P versions, but they differ in physical design and connectivity.
The Arduino Nano is considerably smaller and designed for breadboard installation, making it suitable for compact projects and embedded applications. The Arduino Uno has a larger board layout, making it easier to access connections during prototyping and experimentation.
Choose an Arduino Nano when space is limited or when you need a compact development board. Consider an Arduino Uno when you prefer a larger board for learning, prototyping and connecting components.
Arduino Nano Pinout and Connections
Understanding the Arduino Nano pinout helps when connecting sensors, displays, motors and other electronic components.
The classic Arduino Nano provides digital input/output pins, analogue inputs and communication interfaces, including:
-
Digital pins: Used for reading digital signals and controlling electronic devices.
-
Analogue inputs: Used to read variable signals from compatible sensors.
-
PWM connections: Used for controlling compatible devices through pulse-width modulation.
-
I2C communication: Allows communication with compatible sensors and modules.
-
SPI communication: Supports data exchange with compatible peripheral devices.
-
Serial communication: Enables communication with computers and other electronic devices.
Always check the pinout and electrical specifications of your particular Nano board before connecting external components.
Choosing the Right Arduino Nano Development Board
When selecting an Arduino Nano development board, consider the following factors:
-
Microcontroller: Check whether the board uses an ATmega328P or another processor.
-
Board compatibility: Confirm compatibility with your Arduino sketches, libraries and existing components.
-
USB connection: Check whether the board uses Mini-B USB or another connector.
-
Operating voltage: Ensure the board's voltage requirements match your connected components.
-
Physical dimensions: Consider whether the board fits your breadboard or project enclosure.
-
Starter kits: Choose a Nano starter kit if you need additional components for learning and prototyping.
Arduino Nano Starter Kits and Accessories
Get more from your Arduino Nano development board with suitable accessories and starter kits. Breadboards, jumper wires, sensors, LEDs, resistors, displays and other electronic components can help expand your projects.
Arduino Nano starter kits are particularly useful for beginners who want to experiment with microcontroller programming, circuit building and electronic prototyping.
Shop Arduino Nano development boards and starter kits at Aus Electronics Direct and find compact microcontroller solutions for your next electronics project.
Frequently Asked Questions – Arduino Nano Development Boards
1. What is an Arduino Nano development board?
The Arduino Nano is a compact microcontroller development board designed for electronics prototyping, embedded systems and DIY projects. The classic Arduino Nano is based on the ATmega328P microcontroller and provides digital and analogue input/output connections in a small, breadboard-friendly design. It offers many of the core capabilities of an Arduino Uno in a smaller form factor.
2. What is the Arduino Nano used for?
The Arduino Nano is used to develop and control electronic projects involving sensors, LEDs, motors, displays and other electronic components. Its compact dimensions make it suitable for robotics, home automation, portable devices, environmental monitoring, embedded systems and electronics prototyping.
3. What microcontroller does the Arduino Nano use?
The classic Arduino Nano uses the ATmega328P microcontroller. It features 32KB of Flash memory, 2KB of SRAM and 1KB of EEPROM. This provides sufficient processing and storage capabilities for many electronics projects, sensor applications and embedded control systems. Other Nano family models use different microcontrollers.
4. What is the difference between Arduino Nano and Arduino Uno?
The classic Arduino Nano and Arduino Uno R3 both use the ATmega328P microcontroller and offer similar core functionality. However, the Nano has a smaller form factor and is designed for breadboard installation, while the Uno has a larger layout that provides convenient access to connections during prototyping. The Nano also provides eight analogue inputs compared with six on the Uno R3.
5. How many digital pins does an Arduino Nano have?
The classic Arduino Nano has 14 digital input/output pins, numbered D0 to D13. Six of these pins support PWM output, allowing compatible components such as LEDs and motors to be controlled using pulse-width modulation. These pins can also be configured as inputs for reading digital signals from sensors and switches.
6. How many analogue inputs does the Arduino Nano provide?
The classic Arduino Nano provides eight analogue input pins, labelled A0 to A7. These inputs allow the board to read variable signals from compatible analogue sensors, including temperature sensors, light sensors and potentiometers. The analogue inputs support a range of applications involving measurement, monitoring and electronic control.
7. Is the Arduino Nano suitable for beginners?
Yes, the Arduino Nano is suitable for beginners interested in learning electronics, programming and microcontroller development. It works with the Arduino IDE and supports many tutorials, libraries and compatible electronic components. Its breadboard-friendly design also makes it convenient for experimenting with circuits. Beginners should check USB connectivity and driver requirements for their particular Nano board.
8. What projects can you build with an Arduino Nano?
The Arduino Nano can be used for a wide variety of electronics and DIY projects, including:
-
Small robotics and autonomous robot systems.
-
Temperature and humidity monitoring devices.
-
Home automation and smart control systems.
-
LED lighting and display controllers.
-
Motion detection and security projects.
-
Portable electronic gadgets.
-
Sensor-based automation systems.
-
Electronic data logging projects.
Its compact size makes it especially useful for projects where installation space is limited.
9. What is the difference between Arduino Nano and Arduino Nano Every?
The classic Arduino Nano uses the ATmega328P microcontroller, while the Arduino Nano Every uses the ATmega4809 microcontroller. The Nano Every provides more Flash memory and SRAM, offering additional resources for more complex programs. Both boards share a compact Nano form factor, but their processor architecture, pin behaviour and software compatibility can differ.
10. How do I connect an Arduino Nano to a computer?
Connect the Arduino Nano to your computer using a compatible USB cable. Install the Arduino IDE, select the appropriate Arduino Nano board configuration and choose the correct communication port. Depending on the board version, you may also need to install a USB-to-serial driver. You can then write, compile and upload programs to the board.
11. What programming language does the Arduino Nano use?
The Arduino Nano is programmed using the Arduino programming language, which is based on C and C++. Programs, known as sketches, are written and uploaded through the Arduino IDE. The platform also supports libraries that simplify programming sensors, displays, motors and other electronic components.
12. How do I power an Arduino Nano development board?
The classic Arduino Nano can be powered through its USB connection or an external power source connected to the VIN pin. Its recommended external input voltage through VIN is generally 7–12V. The regulated 5V pin can also be used as a power input under appropriate conditions, but it bypasses the onboard regulator. Always check the specific board's power requirements before connecting an external supply.
13. What is the Arduino Nano pinout?
The Arduino Nano pinout describes the location and function of the board's connection pins. The classic Nano includes:
-
14 digital input/output pins.
-
Eight analogue input pins.
-
Six PWM-capable digital pins.
-
I2C communication through A4 (SDA) and A5 (SCL).
-
SPI communication through D10–D13.
-
UART serial communication through D0 (RX) and D1 (TX).
-
Power connections including 5V, 3.3V, VIN and GND.
Understanding the pinout helps ensure sensors, modules and other components are connected correctly.
14. Is the Arduino Nano compatible with Arduino Uno shields?
The Arduino Nano is not directly compatible with most Arduino Uno shields because the boards have different physical layouts and pin arrangements. However, many components and modules designed for the Uno can also work with the Nano when connected using jumper wires or a suitable adapter. Always check voltage, pin assignments and library compatibility before connecting components.
15. What accessories do I need for an Arduino Nano project?
The accessories required depend on your project, but commonly used components include:
-
USB cable for programming and communication.
-
Breadboard for building prototype circuits.
-
Jumper wires for connecting components.
-
LEDs, resistors and capacitors.
-
Temperature, light and motion sensors.
-
LCD or OLED displays.
-
Motor drivers and compatible motors.
-
External power supplies and connectors.
Arduino Nano starter kits can be a convenient option for beginners because they often include several essential components for learning and experimentation.