-
Filter By Stock
- In Stock (3)
Filter By Brand
- Arduino (1)
- iduino (2)
Arduino Micro Development Boards
Popular Products
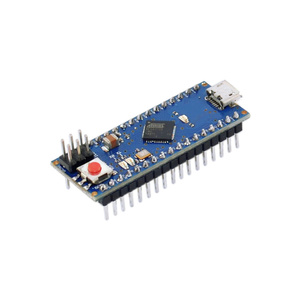
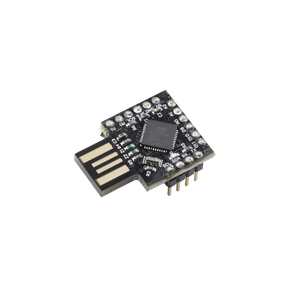
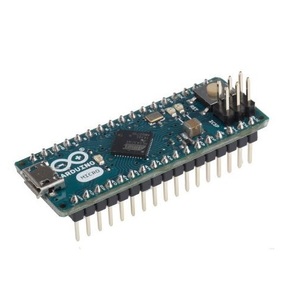
Arduino Micro Development Boards
What Is an Arduino Micro Development Board?
An Arduino Micro development board is a compact microcontroller platform designed for electronics prototyping, embedded systems and interactive projects. Based on the ATmega32U4 microcontroller, the Arduino Micro provides a small footprint while offering a range of digital and analogue input/output connections.
Its compact design makes it suitable for projects where space is limited, including wearable electronics, robotics, automation systems and custom USB devices. The ATmega32U4 also features native USB communication, allowing compatible boards to function as USB input devices such as keyboards and mice.
Arduino Micro development boards are ideal for hobbyists, students, electronics enthusiasts and developers looking to build programmable electronic devices.
Features of Arduino Micro Development Boards
Arduino Micro boards offer several useful features for electronics development and prototyping:
-
ATmega32U4 Microcontroller: Provides the processing capabilities required for embedded electronics and Arduino programming.
-
Compact Design: A small form factor measuring approximately 48 x 18 mm on the genuine Arduino Micro.
-
Digital Input/Output Pins: Provides 20 digital input/output connections.
-
PWM Outputs: Supports 7 PWM outputs for controlling compatible motors, LEDs and other electronic components.
-
Analogue Inputs: Offers 12 analogue input channels for reading sensor signals.
-
USB Connectivity: Provides USB communication for programming and compatible USB device applications.
-
Arduino IDE Compatibility: Can be programmed using the Arduino IDE and supported libraries.
Technical Specifications of the Arduino Micro
The genuine Arduino Micro has the following specifications:
|
Specification |
Details |
|---|---|
|
Microcontroller |
ATmega32U4 |
|
Operating voltage |
5V |
|
Recommended input voltage |
7–12V |
|
Digital I/O pins |
20 |
|
PWM outputs |
7 |
|
Analogue inputs |
12 |
|
Flash memory |
32KB |
|
SRAM |
2.5KB |
|
EEPROM |
1KB |
|
Clock speed |
16MHz |
|
USB connection |
Micro USB |
|
Dimensions |
48 x 18mm |
Note: Specifications can vary between genuine Arduino and compatible development board models. Customers should check individual product specifications before purchasing.
Aus Electronics Direct
+1
What Can You Build with an Arduino Micro?
Arduino Micro development boards can be used in a wide range of electronics and programming applications.
Common project ideas include:
-
USB Keyboard and Mouse Controllers: Create custom input devices using the ATmega32U4's native USB capabilities.
-
Robotics Projects: Control sensors, motors and other electronic components in compact robotic systems.
-
Wearable Electronics: Develop small interactive devices and wearable technology.
-
Home Automation: Build programmable control systems for lighting, sensors and electronic appliances.
-
Interactive Electronics: Create buttons, switches, LED controllers and other programmable interfaces.
-
Embedded Systems: Integrate microcontrollers into compact electronic products and prototypes.
Arduino Micro vs Arduino Nano vs Arduino Leonardo
Choosing the right Arduino development board depends on the size, connectivity and processing requirements of your project.
|
Feature |
Arduino Micro |
Arduino Nano |
Arduino Leonardo |
|---|---|---|---|
|
Microcontroller |
ATmega32U4 |
ATmega328P (classic Nano) |
ATmega32U4 |
|
Digital I/O |
20 |
14 |
20 |
|
PWM outputs |
7 |
6 |
7 |
|
Analogue inputs |
12 |
8 |
12 |
|
USB device functionality |
Native USB |
Depends on USB interface |
Native USB |
|
Typical application |
Compact USB projects |
Small prototypes |
USB interface projects |
The Arduino Micro and Leonardo share the ATmega32U4 microcontroller, while the classic Arduino Nano uses the ATmega328P. The Micro is particularly useful for compact projects requiring native USB functionality.
How to Choose the Right Micro Development Board
Before purchasing an Arduino Micro development board, consider the following factors:
-
Microcontroller compatibility: Check that the processor meets your programming and project requirements.
-
Board dimensions: Choose a compact board if your project has limited installation space.
-
Input and output pins: Ensure the board provides enough digital and analogue connections for your components.
-
USB connectivity: Consider whether your project requires native USB communication.
-
Operating voltage: Check the voltage requirements of the board and connected components.
-
Programming compatibility: Confirm that the board is supported by your chosen Arduino IDE configuration and required libraries.
Getting Started with an Arduino Micro
Getting started with an Arduino Micro is straightforward. Connect the development board to a computer using a compatible Micro USB cable, install the Arduino IDE and select the appropriate board and processor settings.
You can then write and upload sketches to control LEDs, read sensor data, operate motors and develop other electronic applications.
For more advanced projects, consider adding breadboards, jumper wires, sensors, electronic modules and compatible Arduino accessories.
Frequently Asked Questions – Arduino Micro Development Boards
1. What is an Arduino Micro development board?
An Arduino Micro development board is a compact microcontroller board based on the ATmega32U4 processor. It is designed for electronics prototyping, embedded systems and interactive projects. The board features digital and analogue input/output pins, USB connectivity and compatibility with the Arduino IDE, making it suitable for developing a wide range of electronic applications.
2. What is the Arduino Micro used for?
The Arduino Micro is used for building compact electronic projects that require programmable control and USB connectivity. Common applications include robotics, wearable electronics, home automation, custom USB controllers, sensor interfaces and interactive devices. Its small size makes it particularly useful for projects where installation space is limited.
3. What microcontroller does the Arduino Micro use?
The genuine Arduino Micro uses the ATmega32U4 microcontroller from Microchip (formerly Atmel). It operates at 16MHz and includes 32KB of flash memory, 2.5KB of SRAM and 1KB of EEPROM. The ATmega32U4 also provides native USB communication, allowing the board to connect directly to a computer.
4. What is the difference between Arduino Micro and Arduino Nano?
The main difference is the microcontroller and USB functionality. The classic Arduino Nano uses the ATmega328P processor, while the Arduino Micro uses the ATmega32U4 with native USB support.
The Arduino Micro provides 20 digital input/output pins, 7 PWM outputs and 12 analogue inputs. The classic Nano provides 14 digital pins, 6 PWM outputs and 8 analogue inputs. Both are compact development boards suitable for electronics prototyping, but the Micro is particularly useful for projects requiring USB device functionality.
5. What is the difference between Arduino Micro and Arduino Leonardo?
Both the Arduino Micro and Arduino Leonardo use the ATmega32U4 microcontroller and offer similar processing capabilities, digital pins, PWM outputs and analogue inputs. The main difference is their physical design.
The Arduino Micro has a smaller form factor, making it suitable for compact projects and installations with limited space. The Arduino Leonardo has a larger board layout with a different connector arrangement, making it convenient for general-purpose prototyping.
6. How many digital pins does an Arduino Micro have?
The Arduino Micro provides 20 digital input/output pins. These pins can be configured as either inputs or outputs to control electronic components, read digital signals and communicate with compatible sensors and modules.
7. How many PWM outputs does the Arduino Micro support?
The Arduino Micro supports 7 PWM output pins. Pulse Width Modulation (PWM) allows the board to control functions such as LED brightness, motor speed and other devices that respond to variable output signals.
8. How many analogue inputs does an Arduino Micro provide?
The Arduino Micro provides 12 analogue input channels. These inputs can read varying voltage levels from compatible sensors, potentiometers and other analogue devices, making the board useful for monitoring environmental conditions and controlling interactive electronics.
9. Does the Arduino Micro have built-in USB support?
Yes. The Arduino Micro features native USB support through its ATmega32U4 microcontroller. This allows the board to communicate directly with a computer without requiring a separate USB-to-serial interface chip. It also enables USB device applications such as custom keyboards, mice and other HID devices.
10. Can an Arduino Micro act as a USB keyboard or mouse?
Yes. The Arduino Micro can function as a USB keyboard or mouse using its native USB capabilities and compatible Arduino libraries. This makes it possible to build custom input devices, programmable buttons, multimedia controllers and specialised computer interfaces.
11. What programming language does Arduino Micro use?
The Arduino Micro is programmed using the Arduino programming language, which is based on C and C++. Users can write, compile and upload sketches through the Arduino IDE. The platform also supports numerous libraries that simplify communication with sensors, displays, motors and other electronic components.
12. How do I connect an Arduino Micro to a computer?
Connect the Arduino Micro to a computer using a compatible Micro USB data cable. Install and open the Arduino IDE, select Arduino Micro from the board menu and choose the appropriate serial port. You can then write a sketch, compile the program and upload it to the development board.
Make sure the USB cable supports data transfer, as some USB cables are designed for charging only.
13. What voltage does an Arduino Micro require?
The genuine Arduino Micro operates at 5V. When powered through its external VIN input, the recommended input voltage is 7–12V. It can also receive power through its USB connection. Always check the specifications of your particular development board, especially when using compatible third-party models.
14. Is the Arduino Micro suitable for beginners?
Yes. The Arduino Micro is suitable for beginners who want to learn electronics, microcontroller programming and embedded systems. It works with the Arduino IDE and supports a wide range of tutorials, libraries and example projects. Beginners can start with simple applications such as LED control, push-button inputs and sensor monitoring before progressing to more advanced projects.
15. What projects can I build with an Arduino Micro?
The Arduino Micro can be used for many electronics and programming projects, including:
-
Custom USB keyboards and mouse controllers.
-
Programmable gaming controllers and button interfaces.
-
Small robotic systems and motor controllers.
-
Wearable electronics and interactive devices.
-
Home automation and lighting control systems.
-
Sensor monitoring and data collection projects.
-
Custom computer input and multimedia controllers.
Its compact size and native USB functionality make it particularly useful for specialised electronic applications.
16. Is the Arduino Micro compatible with Arduino shields and sensors?
Yes. The Arduino Micro is compatible with many Arduino sensors, modules and expansion boards. However, compatibility depends on pin layout, operating voltage, communication protocols and physical dimensions. Some standard Arduino shields designed for larger boards may require an adapter or additional wiring. Always check pin assignments and electrical specifications before connecting accessories.
17. What is the difference between a genuine Arduino Micro and an Arduino-compatible Micro board?
A genuine Arduino Micro is an official Arduino product manufactured to Arduino's specifications. An Arduino-compatible Micro board is produced by another manufacturer and is designed to work with the Arduino development environment.
Compatible boards may offer similar functionality and use the same ATmega32U4 microcontroller, but can differ in component quality, USB connectors, voltage regulation, dimensions and manufacturing standards. Check the product specifications and manufacturer information to ensure the board meets your project requirements.
18. What accessories do I need to use an Arduino Micro?
The accessories required depend on your project, but common items include:
-
Micro USB data cable: For programming and powering the board through USB.
-
Breadboard: For assembling and testing electronic circuits without soldering.
-
Jumper wires: For connecting sensors, modules and other components.
-
Sensors and modules: For measuring temperature, light, movement and other conditions.
-
LEDs and resistors: For basic electronic experiments and output control.
-
Expansion boards: For adding additional functionality to compatible projects.
-
External power supply: When your project requires power beyond what USB can provide.
These accessories make it easier to prototype, test and develop projects using an Arduino Micro development board.