
-
Filter By Stock
- In Stock (1)
Filter By Brand
- Arduino (1)
Arduino Leonardo Development Boards
Popular Products
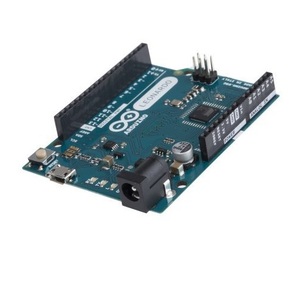
Arduino Leonardo Development Boards
Explore Arduino Leonardo development boards at Aus Electronics Direct. Designed for electronics prototyping, USB communication and embedded applications, the Arduino Leonardo is a versatile microcontroller development board based on the ATmega32U4. Its built-in USB communication capabilities make it particularly useful for projects involving keyboard and mouse emulation, interactive controllers and computer-connected devices.
The Arduino Leonardo provides 20 digital input/output pins, 12 analogue inputs and seven PWM outputs. It offers a flexible platform for electronics enthusiasts, students, makers and developers working on robotics, automation and USB-connected electronics projects.
What Is an Arduino Leonardo Development Board?
The Arduino Leonardo is a microcontroller development board based on the ATmega32U4 processor. Unlike many traditional Arduino boards, the ATmega32U4 has built-in USB communication, allowing the board to communicate directly with a computer without requiring a separate USB-to-serial processor.
This feature allows the Leonardo to operate as a USB keyboard, mouse or virtual serial device, making it suitable for interactive electronics projects, custom input devices and computer control applications.
Features of the Arduino Leonardo
The Arduino Leonardo combines microcontroller functionality with integrated USB communication. Its main features include:
-
ATmega32U4 microcontroller: Provides processing capabilities for electronics and embedded projects.
-
20 digital input/output pins: Connect sensors, switches, LEDs and other electronic components.
-
12 analogue inputs: Read signals from compatible analogue sensors.
-
Seven PWM outputs: Control compatible devices using pulse-width modulation.
-
Built-in USB communication: Allows the board to communicate directly with a computer.
-
16 MHz clock speed: Supports real-time control and embedded applications.
-
Arduino IDE compatibility: Write, compile and upload programs using the Arduino development environment.
-
5V operating voltage: Supports compatible 5V electronic components.
What Makes the Arduino Leonardo Different?
One of the main advantages of the Arduino Leonardo is its integrated USB functionality. The ATmega32U4 microcontroller can handle USB communication directly, allowing the board to act as a human interface device (HID).
This means the Leonardo can be programmed to simulate keyboard and mouse actions when connected to a computer.
Applications include custom USB keyboards, programmable buttons, game controllers, interactive control panels and computer input devices.
USB Keyboard and Mouse Emulation with Arduino Leonardo
The Arduino Leonardo is particularly useful for projects that require custom USB input devices.
Using the Arduino Keyboard and Mouse libraries, developers can program the board to send keyboard commands and mouse movements to a connected computer.
Possible applications include:
-
Custom programmable USB keyboards.
-
Macro keypads and shortcut controllers.
-
DIY computer input devices.
-
USB game controllers.
-
Interactive educational projects.
-
Custom computer control panels.
These capabilities make the Leonardo an excellent choice for developers exploring USB HID functionality and interactive electronics.
What Can You Build with an Arduino Leonardo?
The Arduino Leonardo supports a wide range of electronics and microcontroller projects, including:
-
Custom USB keyboard and mouse controllers.
-
Programmable macro keypads.
-
DIY gaming controllers.
-
Robotics and sensor-based control systems.
-
Interactive electronics projects.
-
Home automation controllers.
-
Computer-connected monitoring devices.
-
USB communication and interface projects.
Its native USB capabilities make it particularly useful for applications that require direct interaction with a computer.
Arduino Leonardo vs Arduino Uno
The Arduino Leonardo and Arduino Uno are both popular development boards, but they use different microcontrollers and offer different USB capabilities.
The Arduino Leonardo uses the ATmega32U4, which has built-in USB communication. This allows it to emulate keyboards and mice directly.
The Arduino Uno R3 uses the ATmega328P as its main microcontroller and a separate USB interface. It is widely used for general electronics prototyping, learning programming and controlling electronic components.
Choose the Leonardo when native USB HID functionality is important. Choose the Uno for general-purpose Arduino projects and traditional prototyping applications.
Arduino Leonardo Pinout and Connections
Understanding the Arduino Leonardo pinout helps when connecting sensors, displays, switches and other electronic components.
The board provides several connection types, including:
-
Digital I/O pins: Used for reading digital signals and controlling electronic devices.
-
Analogue inputs: Used to measure variable signals from compatible sensors.
-
PWM outputs: Used for controlling LEDs, motors and other compatible devices.
-
I2C communication: Supports compatible displays, sensors and peripheral modules.
-
SPI communication: Allows communication with compatible electronic components.
-
USB connection: Provides direct communication with a connected computer.
-
Power connections: Include 5V, 3.3V, VIN and GND connections.
Always check the board pinout and electrical requirements before connecting external components.
Choosing the Right Arduino Leonardo Development Board
When selecting an Arduino Leonardo development board, consider:
-
Microcontroller: Check that the board uses the ATmega32U4.
-
USB functionality: Confirm support for native USB communication and HID applications.
-
Digital and analogue connections: Ensure sufficient pins are available for your project.
-
Operating voltage: Check compatibility with your electronic components.
-
USB connector: Confirm the cable and connector requirements.
-
Board compatibility: Check compatibility with Arduino libraries, shields and accessories.
-
Project requirements: Consider whether USB keyboard, mouse or serial communication is needed.
Shop Arduino Leonardo development boards at Aus Electronics Direct and explore compatible electronic components for robotics, USB controllers, automation and electronics prototyping projects.
Frequently Asked Questions – Arduino Leonardo Development Boards
1. What is an Arduino Leonardo development board?
An Arduino Leonardo is a microcontroller development board based on the ATmega32U4. It is designed for building interactive electronic projects, prototypes and USB-connected devices. Unlike many other Arduino boards, the Leonardo has built-in USB communication, allowing it to communicate with a computer without a separate USB interface chip.
2. What is the Arduino Leonardo used for?
The Arduino Leonardo is used for electronics prototyping, robotics, automation, sensor projects and interactive devices. Its native USB capability makes it particularly useful for projects that need to emulate a computer keyboard or mouse, create custom USB controllers, or send data directly to a computer.
3. What microcontroller does the Arduino Leonardo use?
The classic Arduino Leonardo uses the ATmega32U4 microcontroller, which runs at 16MHz. It provides 32KB of flash memory, 2.5KB of SRAM and 1KB of EEPROM. The ATmega32U4 also includes built-in USB communication, enabling the board's keyboard and mouse emulation features.
4. What is the difference between Arduino Leonardo and Arduino Uno?
The main difference is USB functionality. The Leonardo uses the ATmega32U4, which supports native USB communication and can emulate a keyboard or mouse. The classic Uno R3 uses the ATmega328P with a separate USB interface. The boards also differ in pin availability, memory and some pin assignments, so check compatibility before using shields or project code.
5. How many digital pins does the Arduino Leonardo have?
The Arduino Leonardo provides 20 digital input/output pins. These pins can be configured as digital inputs or outputs for connecting components such as LEDs, buttons, sensors, relays and other electronic modules. Seven of the digital pins can provide PWM output for applications such as LED brightness and motor speed control.
6. How many analogue inputs does the Arduino Leonardo provide?
The Arduino Leonardo has 12 analogue input pins, allowing it to read signals from compatible analogue sensors, potentiometers and other variable-output devices. These inputs are useful for measuring changing values such as light levels, temperature readings from analogue sensors and control positions.
7. What is native USB communication on the Arduino Leonardo?
Native USB communication means the ATmega32U4 microcontroller has built-in USB functionality, so the Leonardo does not need a separate USB interface processor. This allows it to communicate directly with a computer as a virtual serial port, keyboard or mouse, making it suitable for custom USB input devices and computer-control projects.
8. Can an Arduino Leonardo act as a USB keyboard?
Yes. The Arduino Leonardo can emulate a USB keyboard using the Arduino Keyboard library. This allows it to send keystrokes to a connected computer when triggered by buttons, sensors or other inputs. It is useful for creating custom shortcuts, macro keypads, control panels and specialised input devices.
9. Can an Arduino Leonardo act as a USB mouse?
Yes. The Leonardo can emulate a USB mouse using the Arduino Mouse library. It can send mouse movements, clicks and scrolling commands to a connected computer. This feature is useful for building custom controllers, accessibility devices, interactive installations and projects that require computer mouse input.
10. What programming language does the Arduino Leonardo use?
The Arduino Leonardo is programmed using the Arduino programming language, which is based on C++. You can write, compile and upload sketches using the Arduino IDE. The platform also provides libraries and example programs to simplify tasks such as reading sensors, controlling outputs and communicating with USB devices.
11. How do I connect an Arduino Leonardo to a computer?
Connect the Arduino Leonardo to your computer using a compatible USB cable. Install or open the Arduino IDE, select Arduino Leonardo under the board menu, and choose the correct serial port. You can then write or open a sketch and upload it to the board. Some USB cables support charging only, so use a cable that also supports data transfer.
12. How do I power an Arduino Leonardo development board?
You can power an Arduino Leonardo through its USB connection or an external power supply connected to its barrel jack or VIN pin. The board operates at 5V, with a recommended external input voltage of 7–12V. Always check the specifications of your particular board and power supply, and avoid exceeding the permitted input voltage.
13. What is the Arduino Leonardo pinout?
The Arduino Leonardo pinout identifies the board's digital I/O, analogue input, power, ground and communication pins. It has 20 digital I/O pins, seven PWM-capable pins and 12 analogue inputs (A0–A11). It also provides UART serial communication, I2C on pins D2 and D3, and SPI through the ICSP header. Check the official pinout diagram before wiring components or modules.
14. Is the Arduino Leonardo compatible with Arduino Uno shields?
Some Arduino Uno shields are compatible with the Leonardo because both boards use a similar physical layout. However, compatibility is not guaranteed. Differences in pin assignments, communication interfaces and hardware requirements can affect operation. In particular, SPI-dependent shields should have a compatible ICSP connection. Check the shield manufacturer's documentation before connecting it.
15. What accessories do I need for an Arduino Leonardo project?
Common Arduino Leonardo accessories include a compatible USB data cable, breadboard, jumper wires, LEDs, resistors, push buttons and sensors. Depending on your project, you may also need a power adapter, motor driver, relay module, display, USB-compatible peripherals or expansion shields. Choose accessories based on the board's voltage requirements and the connections needed for your project.